Achieving Optimized Depth-Of-Field effect in a 2D Unity Game
Introduction
I am Dimitar from The Sixth Hammer – a small independent Bulgarian game studio, currently developing 2D games. Today I want to discuss with you a very important topic that baffled us since the beginning of the development of our game Moo Lander – and more precisely: achieving Depth-Of-Field Blur effect when working with Unity and 2D Sprites that have semi-transparent pixels.
In this article, I will be talking only about semi-transparent graphics, because if the Sprites do not have semi-transparency, you can just use the same strategy as for 3D and mark them as opaque with an alpha cutout shader.
During the last 5 years we have tested various different ways for achieving it and in this article we will explain all of them and see which one is the best way to implement Depth of Field for a 2D game with semi-transparent Sprites using Unity. I will be calling the Depth-Of-Field Blur effect DoF from here on in this text. And 2D with semi-transparent Sprites – just 2D in short.
How DoF Works for 3D
Before we move onto 2D – a quick recap of how DoF works in standard 3D games:
- A bunch of 3D Objects are drawn on the screen in a front-to-back order (they are all writing in the Depth Buffer, which is used primarily to manage the sorting and avoid the redrawing of unnecessary pixels). And as soon as a pixel from some object is drawn, it writes its value in the depth buffer and subsequent pixels from other objects further away (behind) in the Z space are skipped.
- After the drawing phase is complete, the optional DoF phase begins. Here DoF is called a post-processing effect (because it modifies the rendered screen image, after all objects are drawn). What happens is that a shader is using the rendered screen texture and the depth buffer (where the z information for all pixels is stored) and based on that, it knows where each pixel was positioned in the 3D space and subsequently how strongly to blur it.
That works like a charm for 3D and is dead-simple and lightweight, because it only happens on one texture (post-process) and not upon each render of an object, during the rendering phase.
Why this approach is (near) impossible in 2D?
The answer is very simple – 2D graphics have semi-transparency e.g. multiple objects can contribute to the final color of the pixel. And in that case the Z-buffer cannot store just one Z value, because the end color may not come from one object at one Z position.
This is why Unity is not using a Z-buffer when drawing Transparent Geometry at all and thus DOES NOT offer a solution for post-process Blur effect on transparent geometry shaders (like the shaders used to draw 2D sprites from the SpriteRenderer component in Unity).
There are a lot of other things that are actually happening differently for transparent geometry, opposed to opaque one (such as objects are drawn only back-to-front in Unity).This opens a can of worms in terms of overdraw and performance, but we can discuss that in a future article.
What are our options to have DoF in 2D
Now after we talked about the problem, we will discuss the things we have tried during the years of development for our game, see which one work at all, compare them and discuss why our current strategy is the best among the listed ones. So here are our options:
1. A custom Post-Process DoF for 2D
This was impossible when we started development on Moo Lander. But in the recent years, Unity introduced SRP (Scriptable Render Pipeline) which opened up some possibilities.
The basic idea here is to create a custom-made Z-Buffer and Sprite Shader that writes values to it. But with the big difference that this Z-Buffer would hold the AVERAGE Z coordinates of pixels (for example if you have a 50% transparent pixel on Z 100 and a 50% transparent pixel on Z 0 the end Z coordinate in the buffer for that pixel will be 50. And that is fare, because both pixels have contributed to the final color, displayed on screen).
After that we need a post-process DoF Shader that blurs (for example using the gaussian blur algorithm) the pixels of the rendered image, based on that Z-Buffer. The end-result is that you have a fast blur, but the bad thing is that the average Z approximation is not 100% valid always and you will see some blur artefacts here and there (mostly at the soft edges of sprites, where multiple pixels combine).
The other thing to keep in mind is that if you write your own Pipeline, you will have to inspect a lot of the Unity source code, because at the point of writing this article the SRP (and particularly the 2D features) are still not documented well enough. And lastly, because the result image is blurred together instead of all sprites blurred sampling only their pixels, the blur is not the most-realistic one.
Taking all this into account, this approach was unacceptable for us regarding the quality level we want for Moo Lander, so the option was abandoned.
2. Per-Sprite Realtime Blur
This is the easiest to implement, because you can access the z-coordinate in the sprite shader and you can write a couple of functions in the shader to use that and blur the sprite. You can write whatever blur function you want (Gaussian, Box) to blur the sprites and the blur will look beautifully, 100% correct without any artifacts.
Sadly the weak point here is that the performance is taking a severe hit. We firstly tried with a two-pass gaussian blur (which looked amazing) and then with a simple box blur (uglier then gaussian, but still very good) that is only one-pass but this still required orders-of-magnitude more pixel sampling.
And when you have a game like ours, with thousands and thousands of textures, this quickly drains the GPU sample-rate (especially noticeable on consoles). For us even on PC the Box blur cut the FPS in almost a third (from ~140FPS on GTX1060 to less than 60).
Now, that all depends on the number of sprites you have in your scene – if you have an art-style with less amount of pixels to sample in a frame you may just be lucky and stay within a reasonable sample-rate limit even with the extra blur sampling. But for an art-rich game like ours, this was again a non-option and so we abandoned that as well.
3. Baked Blur
This approach allows us to have gaussian blur on our sprites without a problem and the blur is very beautiful. It does not require writing shaders or custom pipelines, so that cuts the time needed to develop it.
The idea is to have each sprite blurred with a gaussian blur with a LOT of blur levels (we did blurred variants of each sprite with blur radius of 2px,4px,6px,8px,10px,12px,16px,20px,30px) in order to have a smooth DoF effect. And write a script that changes all SpriteRenderers and replaces the Sprites with a blurred version with a certain strength which is based on the Z of the graphics.
I know what you are thinking – this is crazy, it will take up so much memory both on HDD and in RAM, but let me show you why this is not like that and in the end run you can actually save up memory. We are going to look at each of the problems of this blur and how we’ve solved them:
Achieving the DoF Itself
Firstly, we needed the blur to increase in the background and foreground smoothly, so we had a global script that is executed on scene load/unload and on moving something on the Z in the engine.
The script had a config array of blur zones (each one holds a desiredBlurStrength level like 2,4,6,8, corresponding to the blur radius and a startZ and endZ). The script would then change the sprite of the SpriteRenderer component to a blurred version based on where on the Z coordinate the sprite was.
Making the DoF Consistent across Sprites
Secondly, we need to solve a bigger problem – and that is that DoF should look smooth and consistent. And here is where some difficulties arose for us – we had PNG textures in all sorts of physical sizes that were not corresponding to the size within the game.
Moreover we could use the same texture with vastly different scales in different places in the game and we needed to find a way to compensate for that by using different blur level.
To solve the consistency DoF problem, we’ve had the concept of TextureSize (the physical dimensions of the PNG) and ApparentSize (the size drawn on the screen which is based on the scale of the SpriteRenderer’s Game Object and on the distance and settings of the camera).
So we find the ratio of TextureSize and ApparentSIze (if the sprites is not scaled homogenously, we take the bigger difference) and multiply the desiredBlurStrength by that ratio to get the targetBlurStrength. We then find the closest available blur level (for which we have a blurred PNG) to this targetBlurStrength and change the sprite to that blur level.
We followed a naming convention for the PNGs with a suffix “Blurred X” so we could easily find the needed sprites.
Solving the Memory Problem
And lastly – the memory problem. If you just go ahead and create a bunch of blurred versions of each sprite (which we did initially) without any other steps the result will be very aggressive memory growth both in HDD space and in RAM and GPU RAM usage, which is very bad.
Compressing graphics improves the HDD but it does nothing for the GPU RAM usage – it depends solely on the color depth (8,16,32bit) and dimensions (width and height) of the texture.
And then we’ve had the Eureka! moment – we do not actually need all sprites to be in the original resolution, we can resize them firstly and then blur them with a fraction of the desired blur, which we will achieve by the Trillinear Supersampling Filtering when we scale them up in the game. Let me give you an example to understand it better:
- Suppose we have a Sprite 1000x1000px and we want to create a 2px radius gaussian blur copy of it.
- We will not blur the Sprite itself to 2px, instead we will resize it to 50% and then use the ratio of resized to original dimensions to get the value of how much we need to blur it – e.g. in that case with 1px radius, because the ratio is 0.5.
- This will result in the desired 2px blur in the game and it will look the same as if you just went ahead and blurred the original graphics with 2px blur.
The trick here is to find the MAXIMUM ratio at which we can scale down, before we blur. We did it with experimenting for each blur level and the result was that ALL of the blur levels (2,4,6,8,10,12,16,20,30) of a sprite combined had a little more than the original image’s pixel count (and thus HDD and RAM usage).
And moreover, because we mainly used blurred copies for the sprites in the BG and FG, we actually had a memory drop (because even the first blur level uses ¼ the memory of the original sprite). This was amazing!
One other thing to note is that you need to write a script that updates the PixelsToMeters value in the Sprite Meta file in Unity accordingly for each blurred sprite because of them being resized. Otherwise the size of sprites will change when you change graphics in the engine.
And finally – if you are using Sprite Atlases (which you should) and you are packing both blurred and unblurred images in the same sprite, then all of this will be loaded into memory, regardless if you are using only some blurred versions.
So do not forget to DELETE the unused assets before doing a build to have the smallest memory usage.
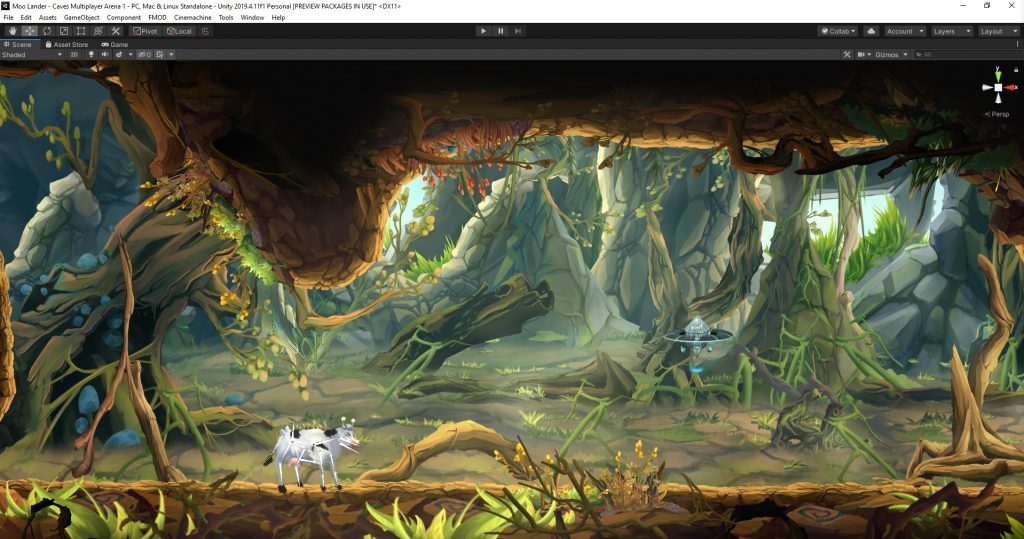
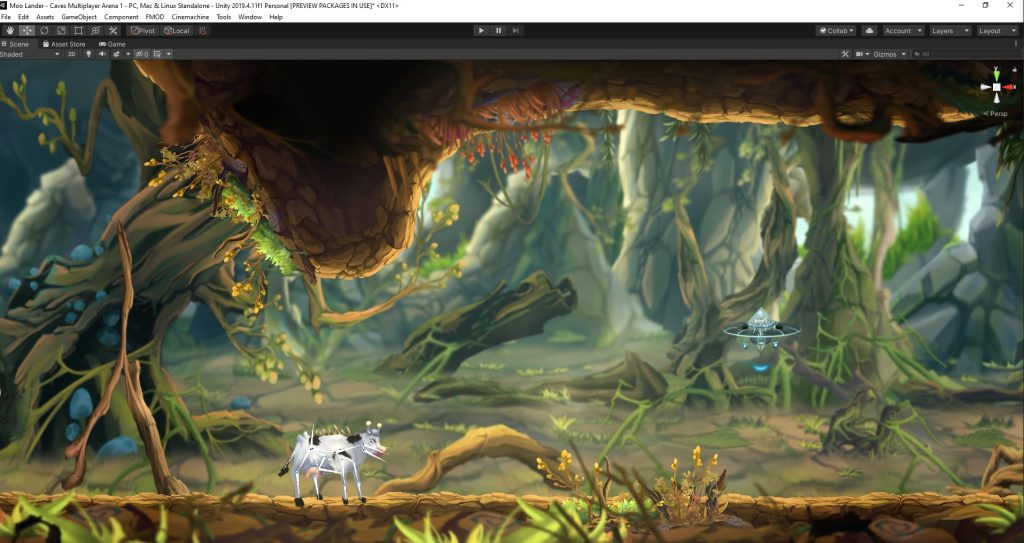
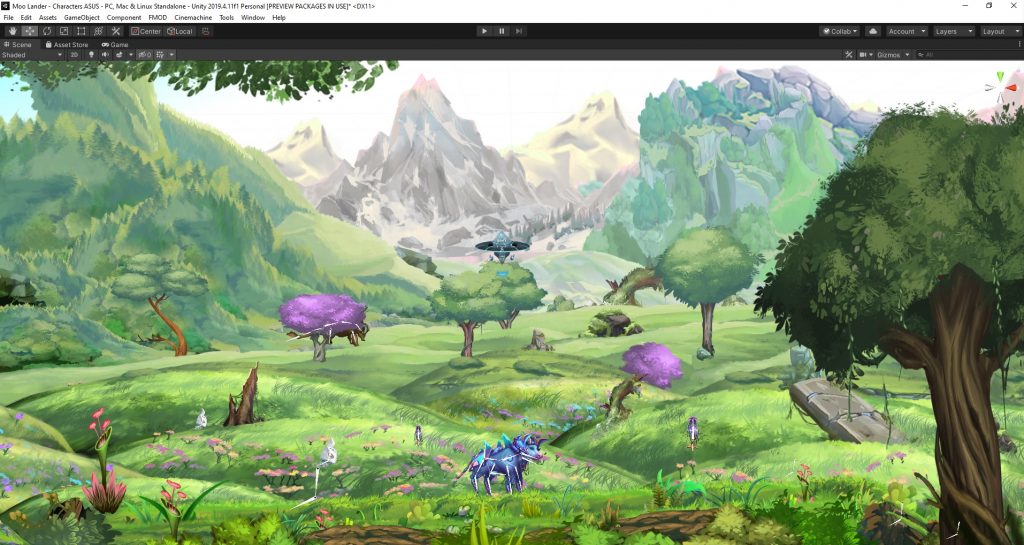
Here are some images, to show the result with side-by-side of Unblurred vs Blurred version of the scenes in Moo Lander:
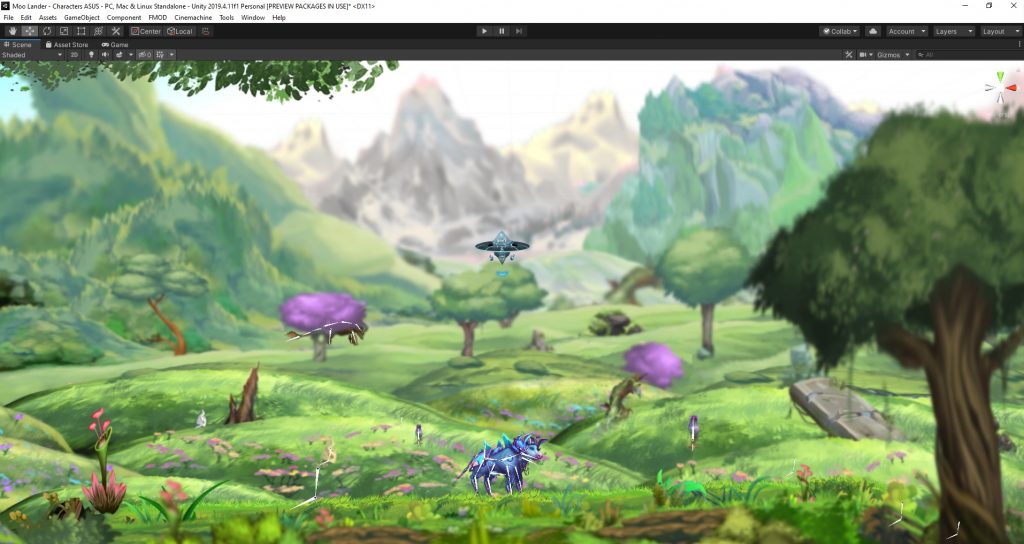
Tools we have used to blur and resize sprites
We used ImageMagick Command-Line Tool in combination with our own DIY solution, written in C# to achieve the copying, resizing and blurring of PNGs and editing their PixelsToMeters values in their corresponding meta files.
Conclusion
As you can see, we have tried a lot of things during the years of Moo Lander development until the moment we achieved a good-looking DoF that we liked. We tried a lot of things, but in the end (at the moment of writing this) baked blur seems to be the best option for 2D. Especially for games with diverse scenes which also need to be ported performantly to consoles.
It was a pleasure sharing this information to our fellow indie developers out there – I hope this will help someone struggling with that same problem. And we also absolutely plan to develop this into a plugin for the Unity Asset Store that works out of the box with the Unity asset system. Wish you all happy coding and best of luck with your awesome games!


